Changing out worn shocks might be most effective and cheapest fix that can transform the ride handling of your car for the better. My S600 had very noticeable up and down wobbling when driving over bumps and a quite large body roll making in tight corners. It was becoming a bit boat like there at the end. The S600 is a very heavy car and needs good handling when going fast. A flatter ride in corners also makes for a more comfortable drive overall, so your passengers don’t wake up from their naps.
Changing the shocks will reduce wear on other more expensive suspension components like bushings and tires, while overly worn might damage the suspension. Changing the shocks is in your interest to be an economical DIYer.
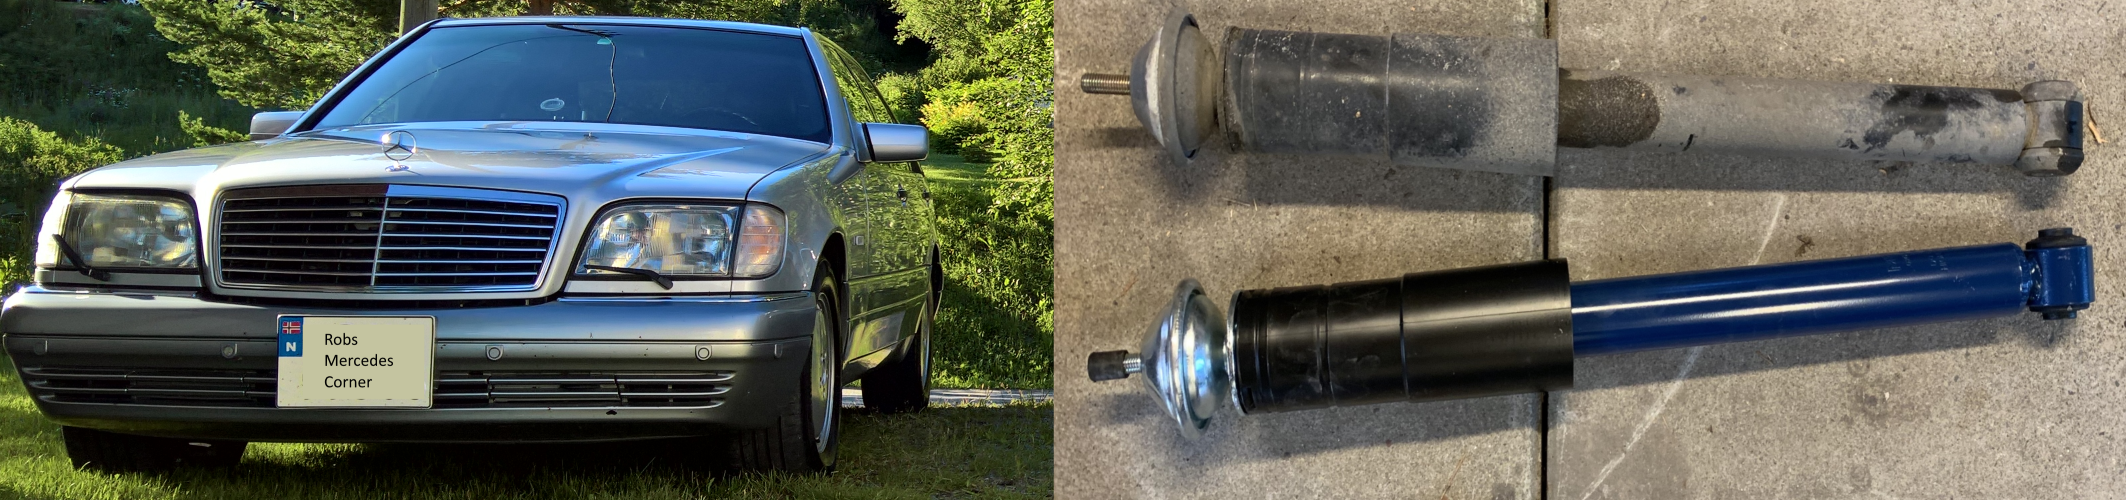
The front suspension uses normal a McPherson setup with separated gas shocks detached from the springs and can easily be removed. The rear suspension on the other hand uses the more complicated SLS leveling suspension setup and don’t use shocks at all. Instead it uses hydraulic rams along with pressure spheres. More effort and money is needed when doing maintenance on the rear suspension than the front. The SLS however normally lasts a lot longer if you remember to change the fluid once in a while.
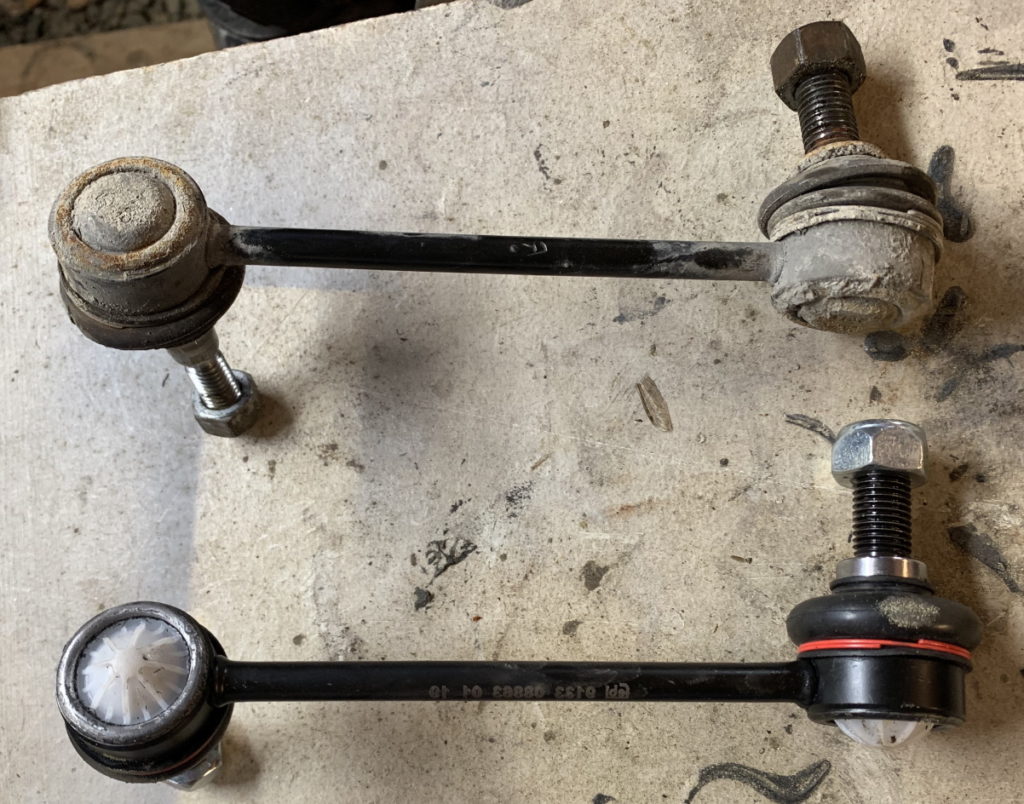
When changing the shocks you should also use the opportunity to inspect/change some other wear items easily accessible in the front suspension. This could be sway bar links or the brake rotors and pads. The sway bar links wear down faster than the other suspension components due to their tiny ball joints and should be replaced whenever cracks appear in the sleeves or any slack starts to be noticeable. Worn sway bar links can make annoying sounds for you and your passengers. We all know expensive cars are known for being the most squeaky cars around, let’s change that!
Preparation
You should expect to use around half day to a day on this job, depending on your skill set, the amount of rusty bolts and your tools at disposal. It’s something you can do easily on a weekend. When doing the job I was even under time pressure since I had to catch a flight the same day. I managed to catch the flight and get the job.
If you want to bundle more front suspension jobs while doing the shocks, I recommend removing the front wheels and inspect the suspension such as the sway bar links, brake pads and rotors as well as the tie rods. Any more advanced jobs than that you will will require a lot more time invested so be sure to plan accordingly. Usually large front end jobs require a re-alignment of the suspension, but is not required here.
Parts needed (as described in the article):
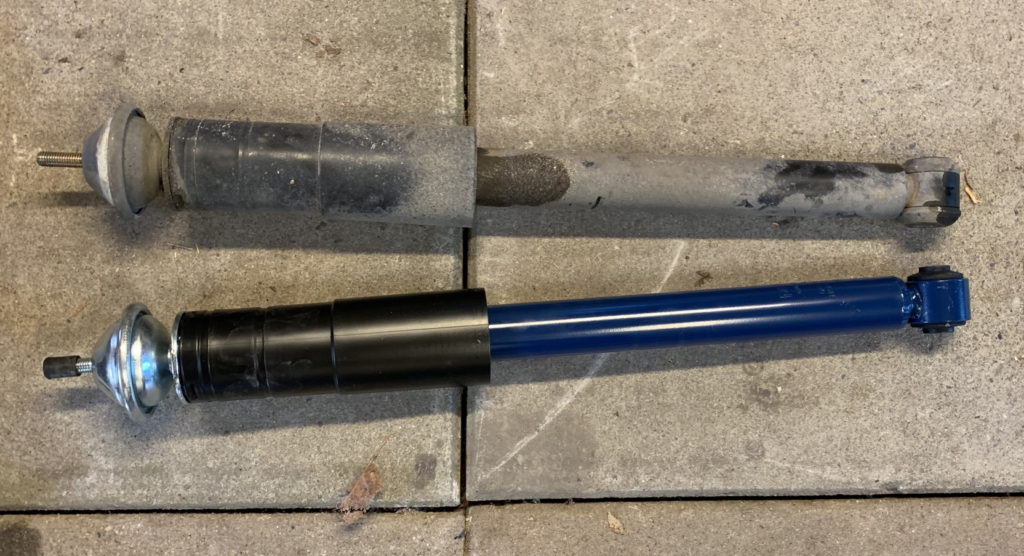
- 2x front shocks. I recommend premium brands such as Bilstein or Meyle
- 1x Left front sway bar link
- 1x Right front sway bar link
Tools needed:
I ended up using quite a tool collection because of rusted bolts on the sway bar links, but this might not be the case for you. I think this collection of tools goes into most home car mechanics tool box, but there might be a couple of them you should consider getting. Always better to be prepared than sitting there stuck without finishing the job.
- Jack and 2 jack stands
- Socket set
- Long breaker bar
- A set of long spanners
- High quality hex sockets
- Torque wrench
- Hammer
- Rubber/plastic hammer
- Pin punch driver
- Locking pliers
- Long Hex keys
- Propane blow torch (super handy when things are stuck)
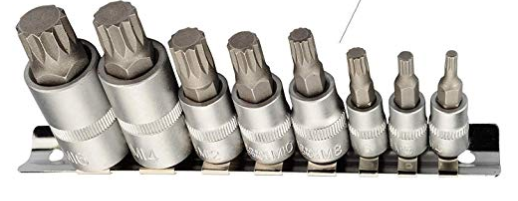
- XZN (12-spline) sockets (super handy when Hex nut gets rounded off)
- Blue thread lock (for brake caliper bolts)

Procedure
Start by raising the front of the car and remember to use the E-brake together with wheel stops. Place the front on jack stands. I also like to keep the jack in the up position as redundancy on the side I’m working with. You can lift the w140 with the jack on the rubber jacking pad and place the jack stands more towards the center of the car under the sub frame.

The shocks can be removed when the calipers are in place, but to remove the sway bar links, both the calipers and the brake rotors need to be removed to access it. I will first describe how to replace the shocks since it is a much easier job. Then I will describe how to replace the sway bar links.
Shocks
Start by removing the lower bolt. Use a long breaker bar and a large spanner to break the bolt loose. Then move to a ratchet to get the nut off. Use the jack to lift the lower suspension arm a little bit to relieve some tension in the bolt through the bracket hole. Then use a punch to smack out the bolt with a hammer. Be careful if the bolt catches too much, then try to relieve more pressure before continuing. Most shocks do not come with replacements for the lower bolt and nut, so try keeping these in good shape.
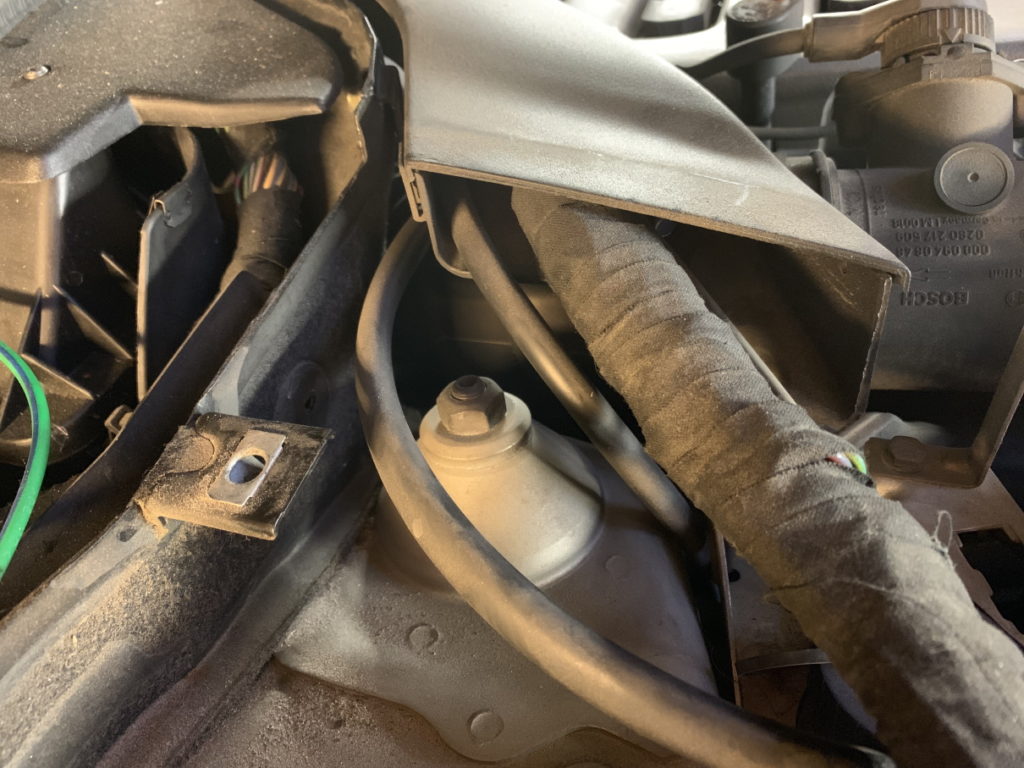
When the bolt is loose, open the hood and locate the top nut. The top part of the damper can look different from each other. You have to keep the strut bar still with a hex socket or flat pliers while using a spanner to unbolt it. There exists a special tool to do this with a socket, but is frankly unnecessary except if you’re addicted to tools. This locking nut always comes with a replacement nut and you should throw away the old one. When the locking nut is off you can easily remove the old damper.
Before installing the new damper, push it completely down a few times to relieve tension. The installation orientation has no influence if the brand does not specify it. Start by installing it with the top part and the top locking nut. When installing the new damper you must take of not letting the damper shaft rotate while turning the locking nut. Keep it secured while fastening the locking nut. This is to reduce the risk of breaking the internal seal of the damper so it will start leaking. The nut does not need to be extremely tight, but do tighten it until you feel it is secure. It is very important to make a re-tight after the car is on the ground. I will remind you of this again shortly.
Now you will probably notice that the new damper is quite shorter than the old one when you took it out. You therefore have to compress the spring by jacking up the lower suspension arm until you can align up the bolt hole. This might be a bit tricky and use a hammer to punch the bolt through since it is nearly impossible to align them up 100%. Again take care of not ruining the threads on the bolt. The lower bolt and nut should be torqued to 80Nm.
Front sway bar links
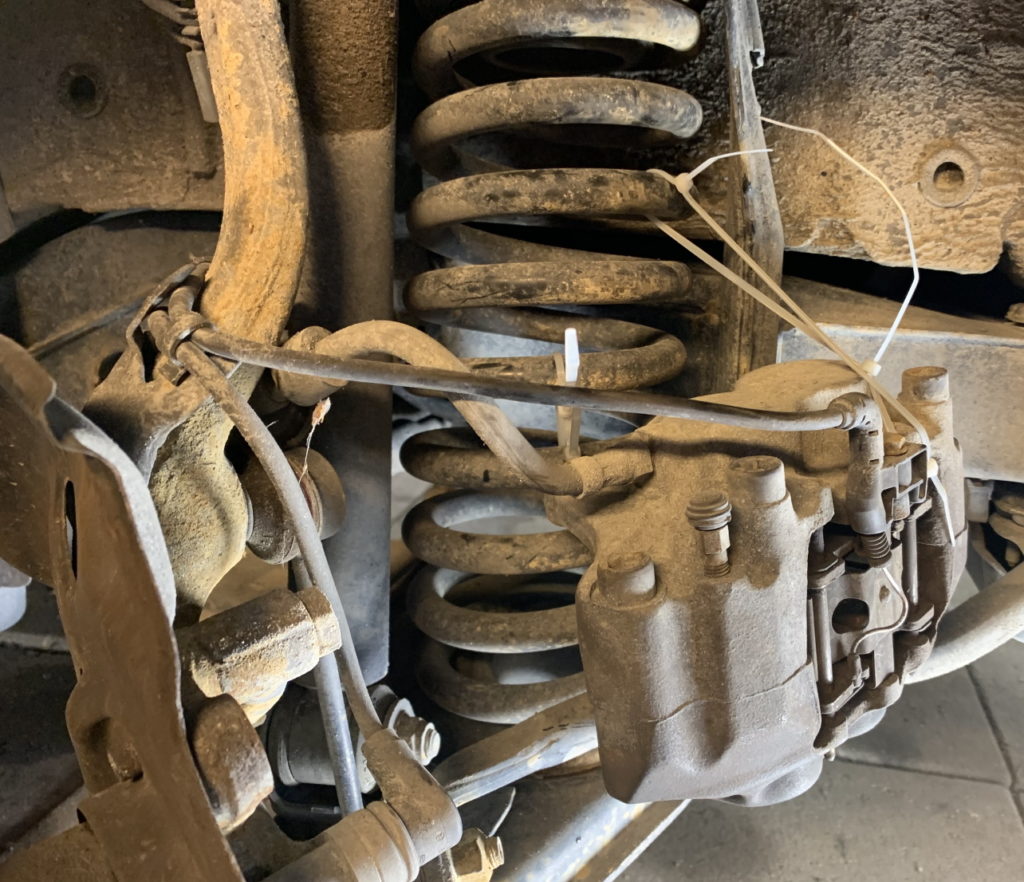
Now on to the more fun part where you can expect to meet more of a challenge. First you need to turn the wheel you’re working on all the way out to get access on the backside. Start by removing the caliper, it is held by two bolts. You may require some force to break them loose. Prepare some method too hook the calipers up in the spring to relieve tension on the flexible brake hoses. Never let them hang freely. I used long zip ties here and I could just to cut it off when done. But a simple S-shaped hook would have been even easier!

The caliper might be difficult to get off if the brake rotor has a lip on the edge. Use a pry bar or the back side of a hammer to press in the outer brake pad by using the rotor for leverage. Be careful not to damage the pad material. When the caliper is loose, secure it up onto the spring.
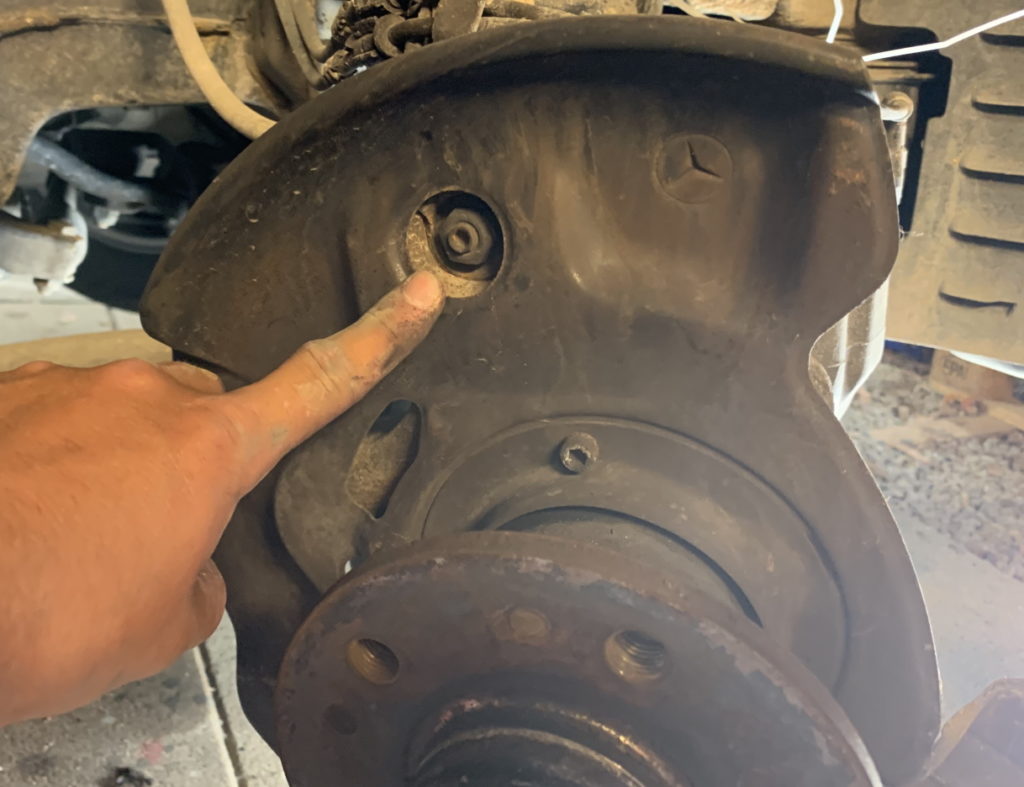
When the brake caliper is loosened you can start remove the break disk rotor. It is secured by a tiny hex nut, but you might find this lost or broken. Mine was broken off on the right side, but the left one was fine. Loosen the nut with a hex socket. If the brake rotor is sticking to the hub, try hammering gently on it with a plastic hammer. If it does not pop off, it can be quite frozen due to rust and you’ll need heat to loosen it. Ignite up your blow torch and heat the area just around the hub. This should expand the rotor just enough so it will pop off with a light hammer blow. Over heating the hub might make the hub grease melt and run out, so be careful with the heat.

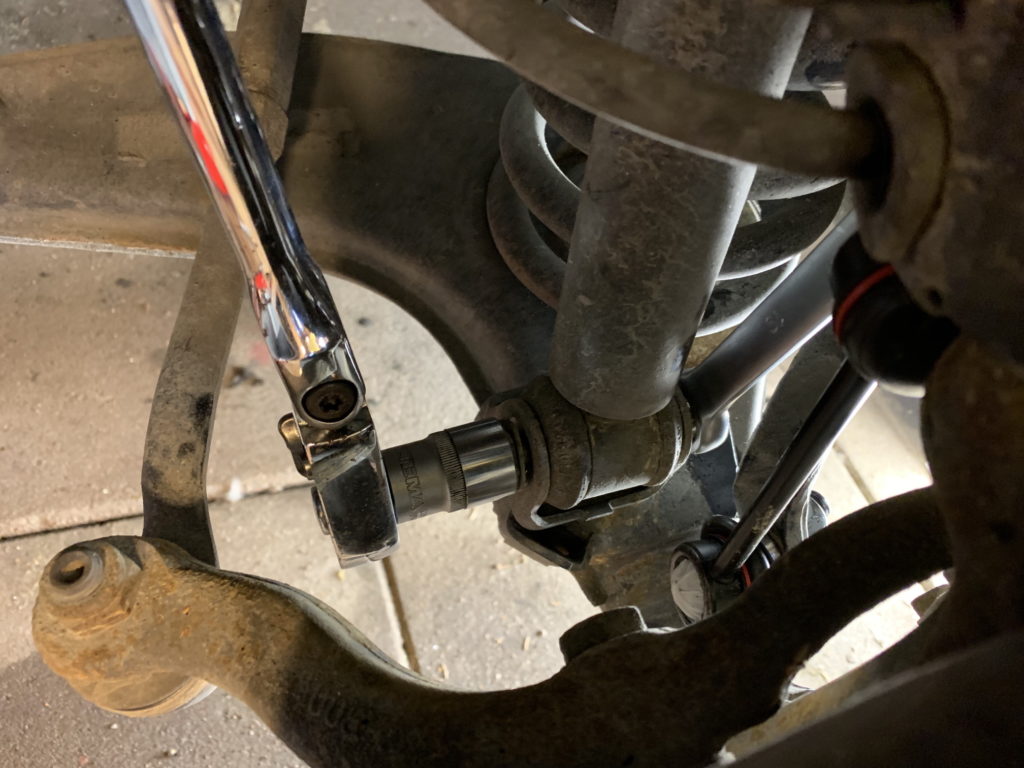
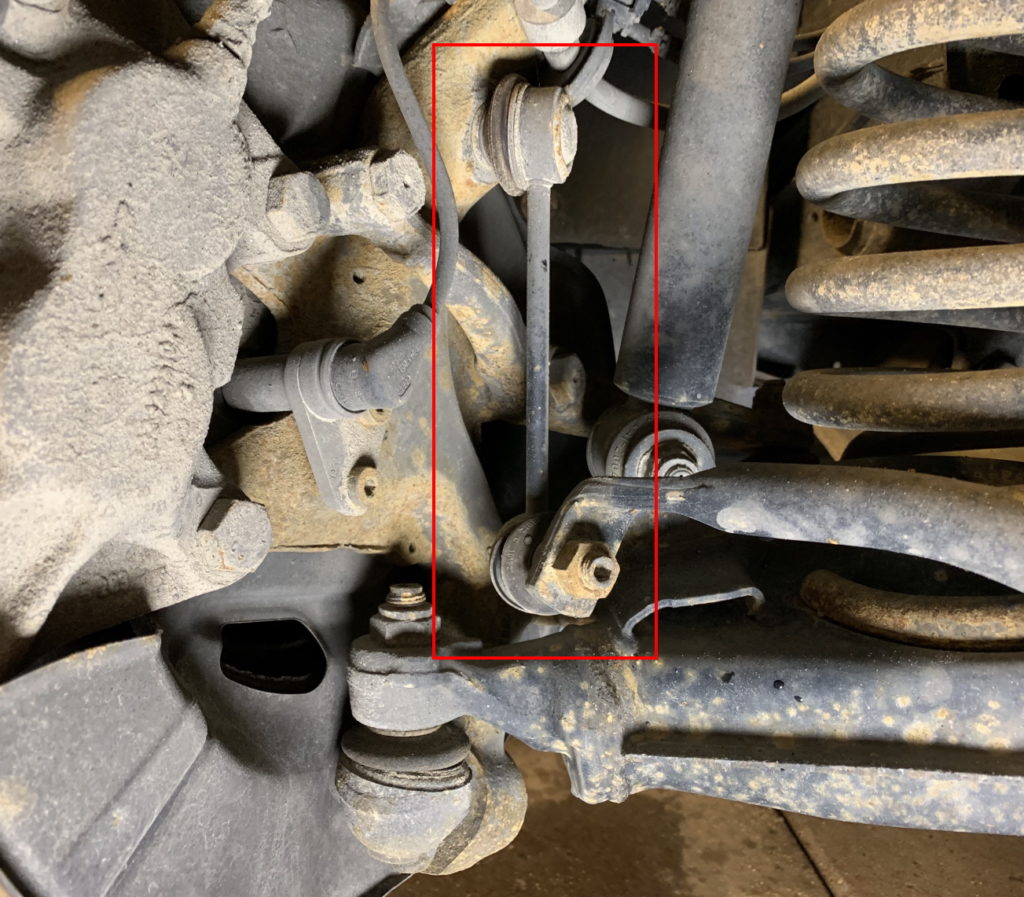
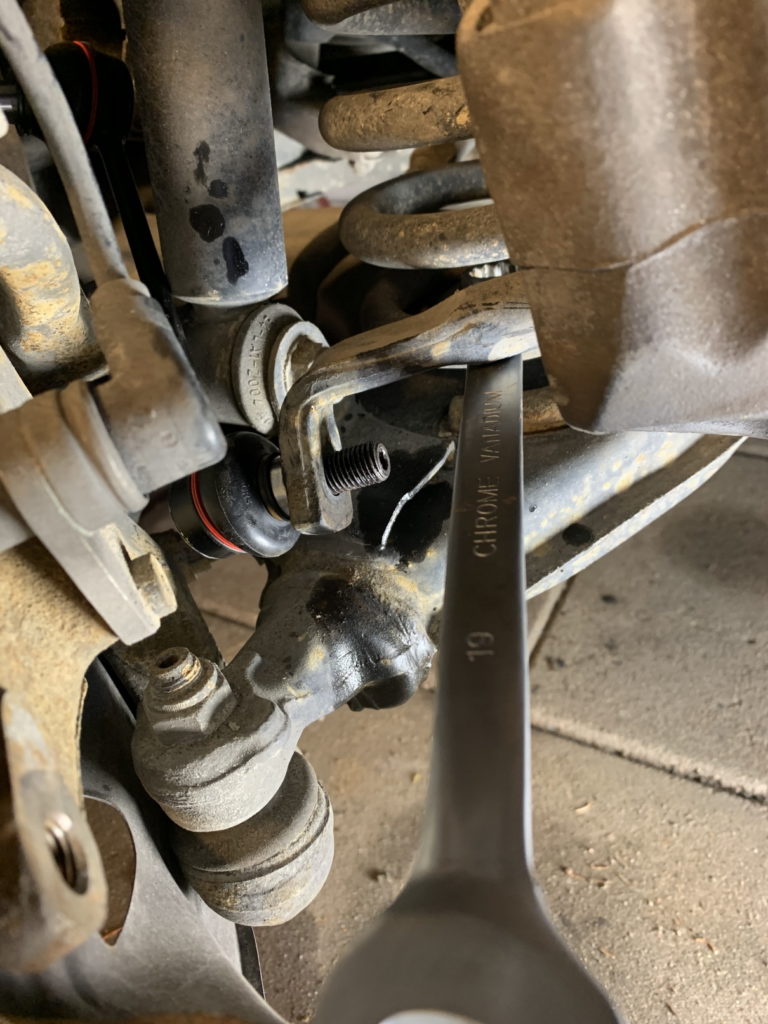
Now it’s the time to locate the outer sway bar link nut. Cross your fingers for no rust. It is located right under the brake rotor. The locking mechanism is not the best engineering, since you’ll need either a special tool or trying to combine a socket with some magic tricks. I used a socket, secured it with locking pliers and then used a hex key sticking through it. After some fiddling I managed to get the nut off. You can usually loosen the bolt the first few turns by using just the socket normally.

Location of sway bar nut. 
Fiddle in order to loosen the nut.
The upper nut should be the easier of the two to get off, since the lower one usually gets all the rust and is easier to round off the hex bolt head. Soak it thoroughly with rust penetration fluid and let it work for 15 minutes. Then use a hammer and whack that nut good a couple of times.

I got lucky with one side, but the other side I had to drive in an over sized XZN socket with a hammer so it’s surely stuck in there. Then I could get enough torque to loosen the rusted nut. This will obviously destroy the part, but it’s thrown out anyway. Unfortunately I did not get any pictures of this process since I was struggling a bit and running out of time.

Now you should be able to remove the sway bar link. Go fetch the one that fits depending on the side you are working (hopefully you order the correct ones). Fit the top side first, then you move on to the lower side. It can a be a bit tricky to fit the lower side onto the sway bar again. Get a long bar or a long spanner and wedge it between the spring to get leverage to push down on the sway bar.
It is not necessary to tighten the sway bar links very hard, just snug with enough force so they sit on. Remember these will probably rust tight faster than you can say cheese and the hex bolts will round off again.
Caution: Before assembling the rotors, make sure you brush off any old rust off the hub face and the inside of the rotor. This is to prevent rumbling while braking and that the rotor sits on straight! You can use a steel brush and a rough pad to do this. Also brush off any surface rust on the front side of the rotor where it meets the wheel.
The front caliper bolts need a layer of blue thread locker on them since there are no shims or similar. Use 115Nm torque when tightening the caliper bolts.
It can be a bit tricky to mount the wheel if the little rotor locking nut is missing, so a replacement might come in handy here. Otherwise you have to align the hub with the rotor first and then with the wheel when sticking in the bolts.
Now I hope you will take on this task without paying stupid amounts of hours for mechanics to figure this out at a workshop. Go do it yourself!
Cheers, Robs out!