Water sports in pools within the coupé
I realized that the car have had a small repair on the lower section under the left side rear quarter window due to a parking ding or something in the past. How do i know that? The lower panel had no water drain holes! How is this possible to be so sloppy when fixing a repair? They must have known it would start rusting immediately when the water has nowhere to go every time it rains.
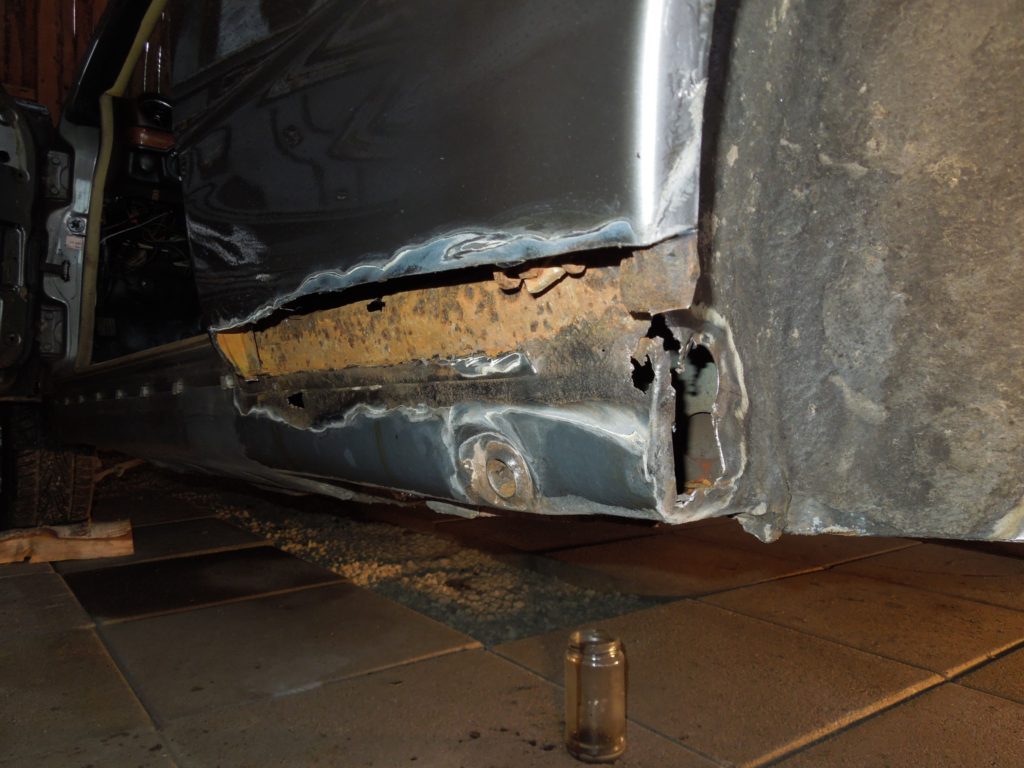
The outer car window seals are never completely rainproof since the windows are made to be lowered. Especially when the windows are lowered when they are wet they drag lots of water into the panels. This is fine since the water can escape through drains through the lower panel. However here there were no such thing like on the right side. Idiots… The result are massive amount of rust in this area, both on the inner canal panel and the outer body panel. Thankfully the welding was quite easy since it involved straight large panels. The big part was removing the panels in the interior and working in tight areas.
Lets get to work, start tearing those inner panels off, hopefully without damaging them and breaking clips.

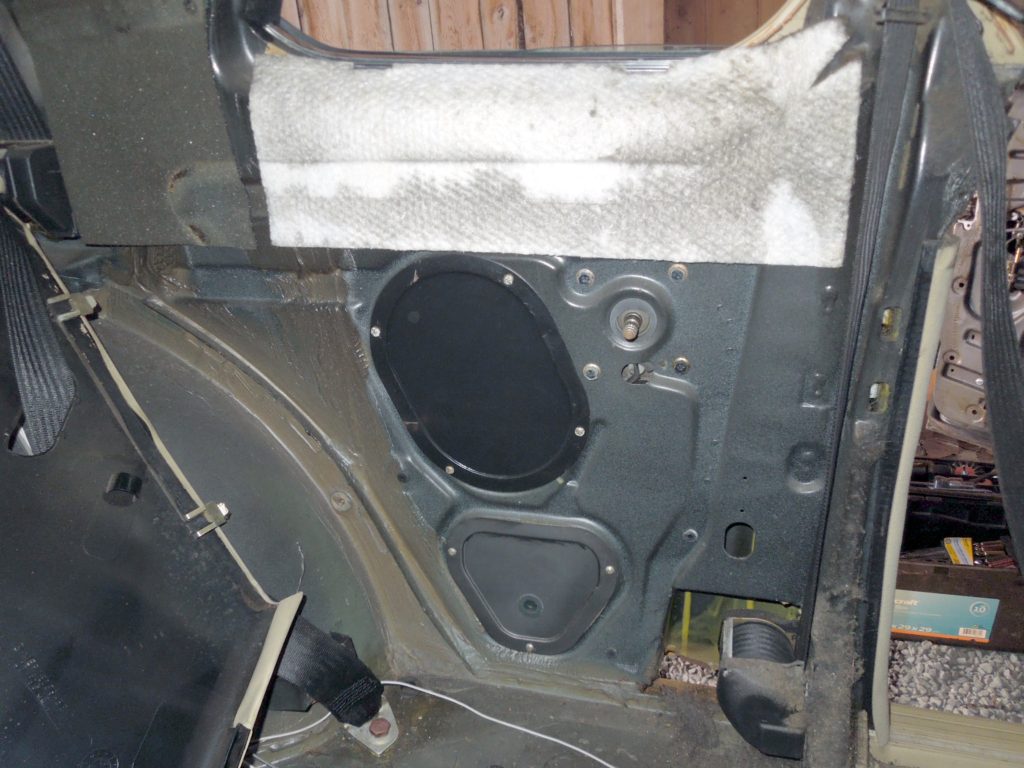
Do you see that hole behind the seat belt puller? Obviously there was no hole before, no drains remember… But after removing the the rusted metal a huge hole was left, maybe a bit too much? To get access to the inside I had to remove even the window mechanism.
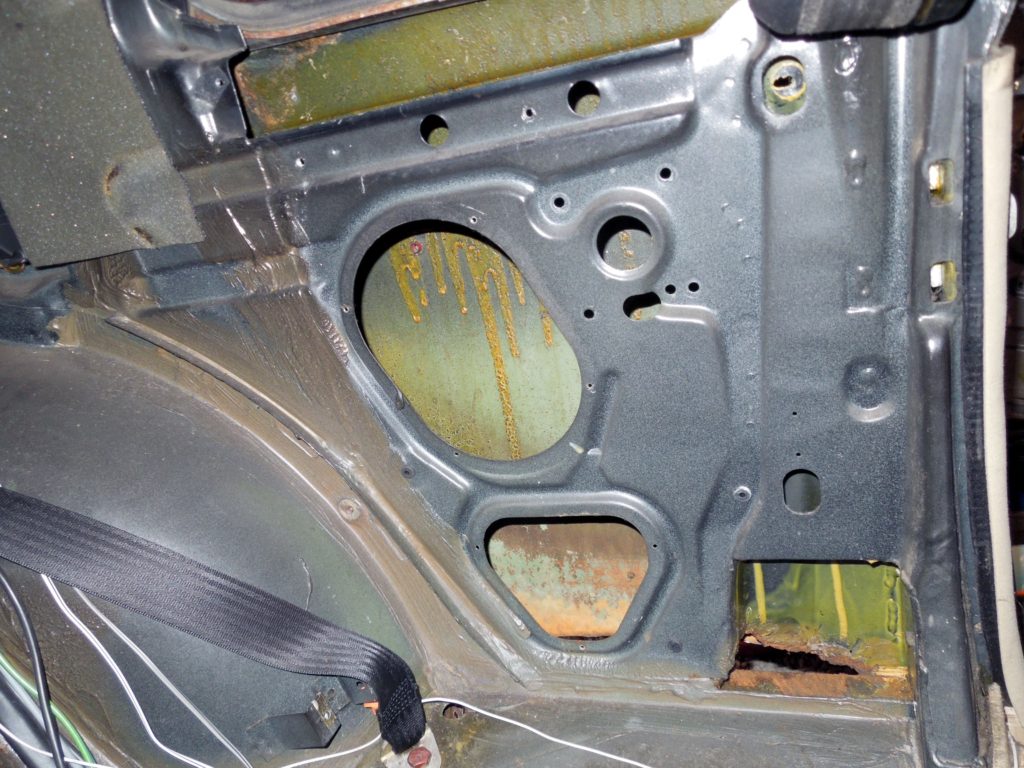
The hole left was huge, all that lower panel had top be cut off and even the inner panel is rusted out and needed to be removed.
After cutting the inner panel and welding in a new one it looked like this. I got access through the other hole in channel to paint it, there is a large rubber plug one can open. Needed to recreate the corner there as well, a bit tricky, but very satisfied with the result.
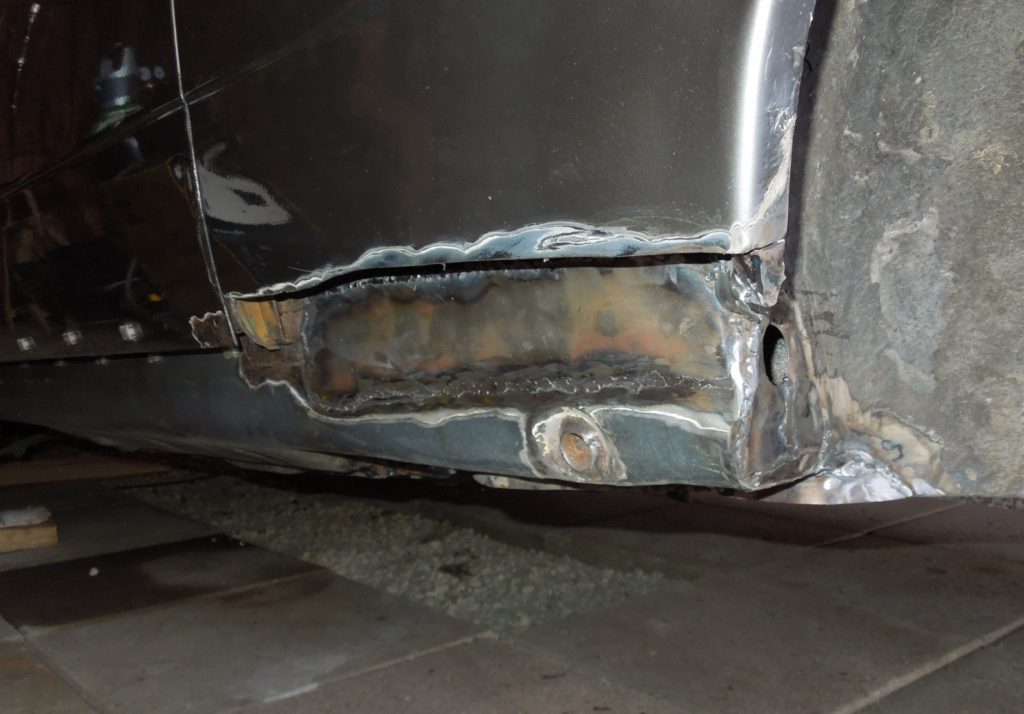
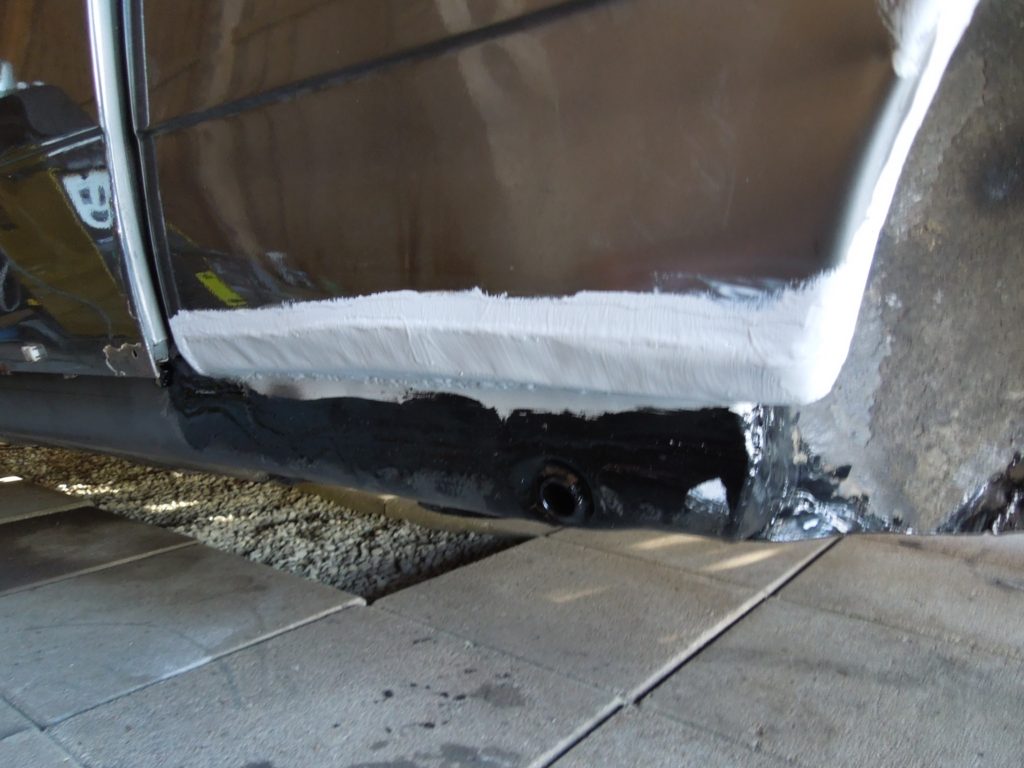
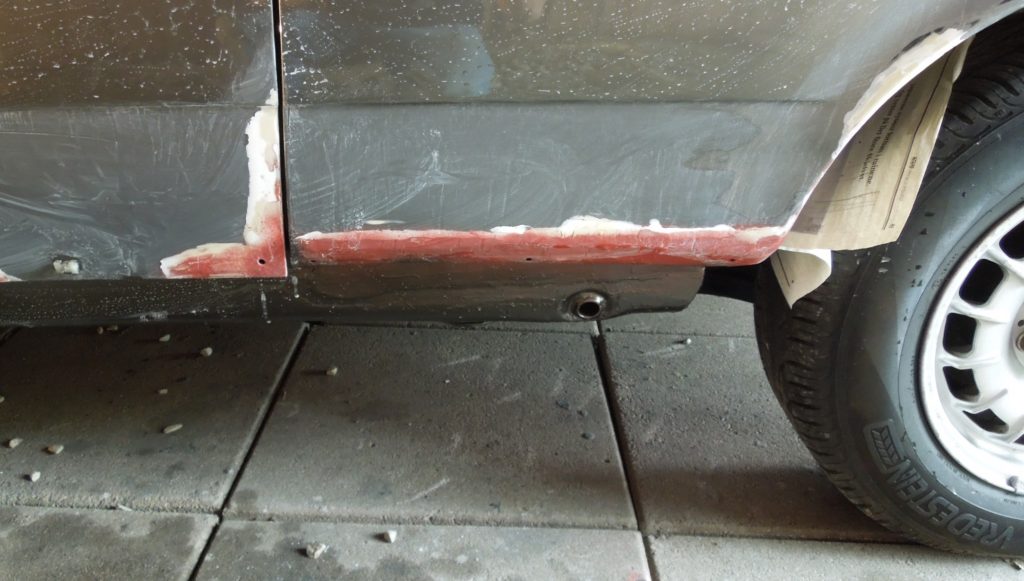
What remained was to weld the outside panel, paint it, make drain holes and side trim fastener holes. Obviously paint it on the inside as wheel since all the water is going there from the window. Don’t want it to rust again.
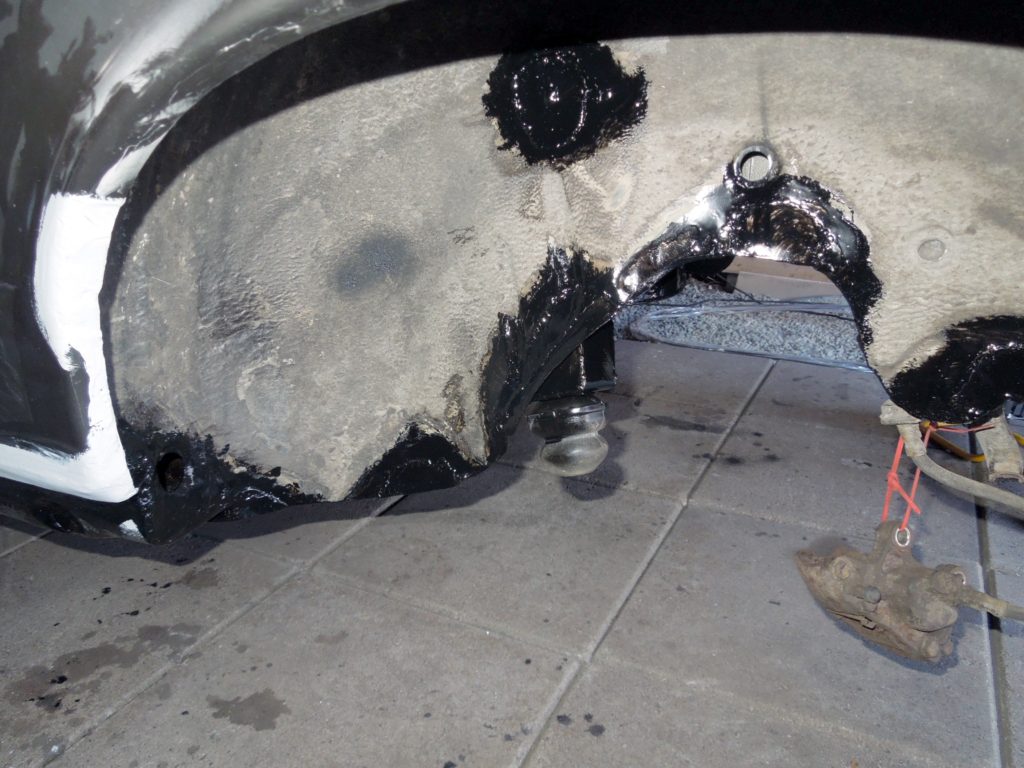
Now on to the wheel well, It had some rust holes spread out, and the worst part was at the point where the rubber end stop was (if the car bottoms out this will prevent the wheel hitting the upper part). I had to make a new bracket from scratch.
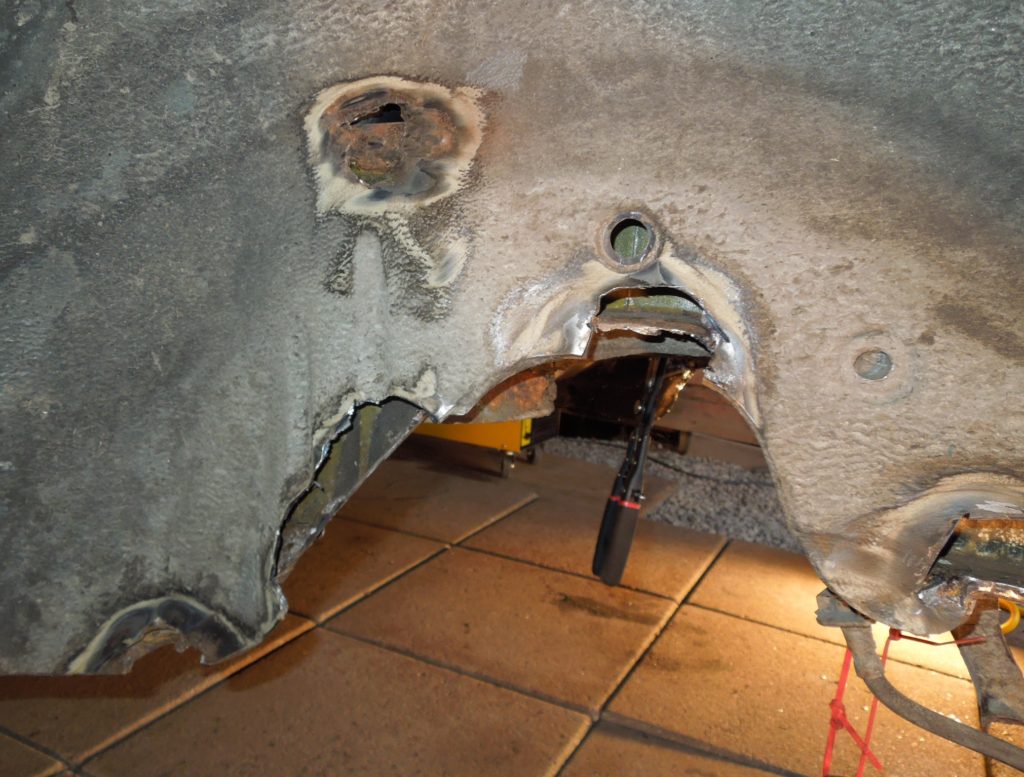
The metal bracket holding the rubber on the left side of the car was so rusted I threw it out. This is a part that is welded to the car and cannot be replaced. So I made a new one, I think my design is even better and more strongly built than the old one. The rubber can be replaced and I changed them too. In the picture under you can see the original bracket for the right side, and creation of a new bracket for the left side. They are mirrored since they are on different sides of the car.
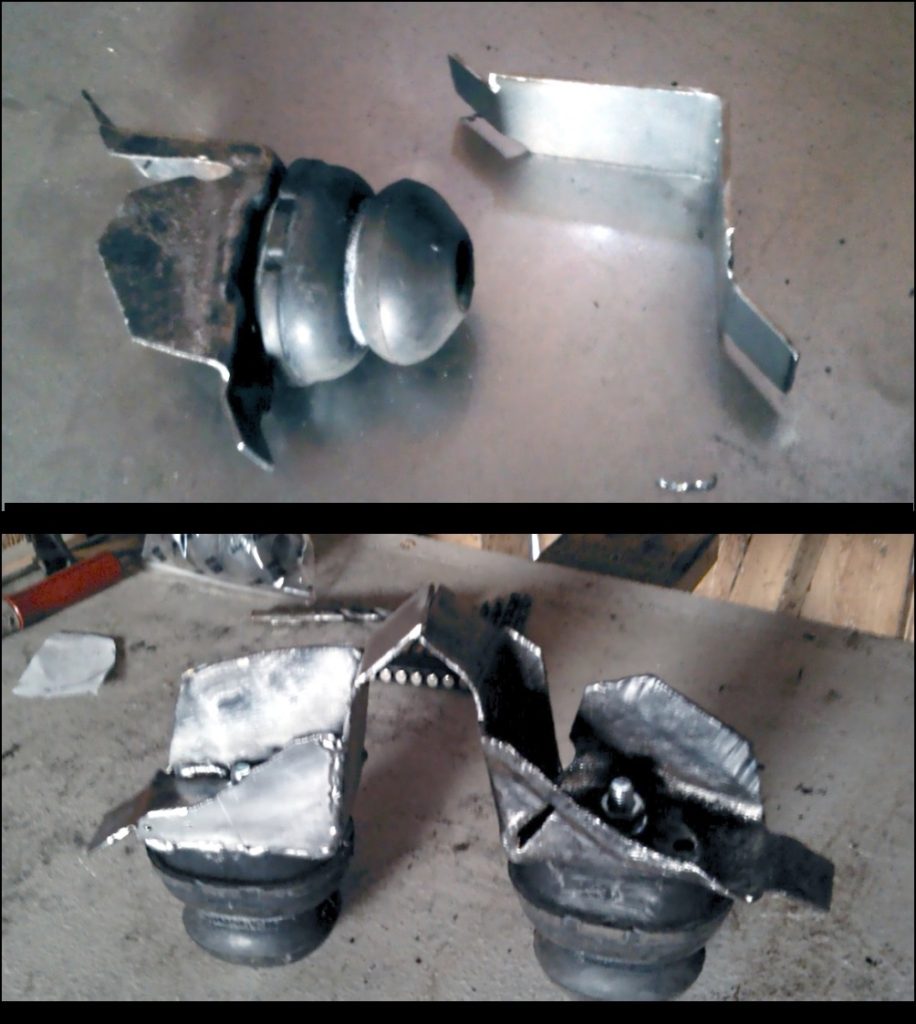
I also made a new mount on the car out of 2mm steel plate which is super solid. The end result is under